Insert From Device in FileMaker Go 13
Last year I wrote a blog post about barcode scanning using FileMaker Go 12. At the time there was no way to do this directly from FileMaker, you had to call a third party application to do the actual scanning, which would then pass the results back to FileMaker. However, with FileMaker Go 13, you can do this all within FileMaker using a new script step called Insert From Device. This script step actually has a number of useful features that let you pull in content from your iOS device, of which barcode scanning is just one option.
When you add the Insert from Device step to a script, you will notice two options in the bottom right of the Manage Script window – Specify target field and Insert From. Select target field lets you choose which field to save the data; Insert From will bring up a list of places that you can pull content from.
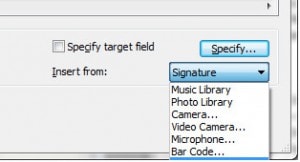
Insert from Device Options
The first two options are Music Library and Photo Library; these are pretty straightforward; they will bring up your photo or music library, and you can pick a picture or audio file which will then be inserted into the container field. The next two options allow you to insert an image or video from your camera; choosing either Camera or Video Camera will bring up a dialog where you can pick which camera you want to use (front or back) and the resolution (full, small, medium or large). Choosing Video Camera also allows you to set a maximum duration of the video to be recorded, and whether or not you want the video to start recording right away. You can also choose Microphone, which lets you record audio from your device’s microphone; like the Video Camera option you can choose the maximum duration of the audio to be recorded, and whether or not you want to start recording right away
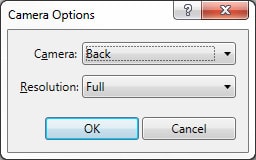
Insert from Camera
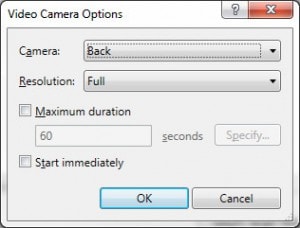
- Insert from Video Camera
The next option is Bar Code, and it works similar to capturing an image from the camera, but there are a few more options. You can choose to either use the camera to scan the barcode, or specify a container field where the barcode image is stored. If you choose the camera, you are given the same options as capturing images from the camera (front or back and resolution). You also need to choose the type(s) of barcodes to scan; there are about 16 to choose from. By default all types of barcodes are selected. Once you scan the barcode, the information that gets stored will depend on the target field. If the target field is a text field, then it will just store the barcode data. If you chose a container field, it will store an image of the barcode, as well as the barcode text (which you retrieve with the GetAsText function) and the barcode type (which you can retrieve with the GetContainerAttribute function).
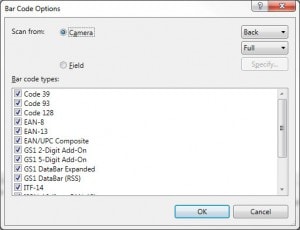
Scan Barcode
The final option is Signature. This will bring up an area where the user can write their signature; once they have finished the signature will be stored in the target field.
While many of these options were available in the previous version of FileMaker Go, there was no way for the programmer to specify which options the user had access to – for example, if the programmer wanted to have the user capture a signature in a container field, the user would be presented with all the options that were available (camera, Photo Library, signature, etc) and they would have to choose signature; there was no way for the programmer to automatically bring up the signature window. The Insert from Device script step makes it easier to build more intuitive interfaces for FileMaker Go.


Comments