Themes and Styles in FileMaker 13
Themes aren’t new to FileMaker 13. They were introduced in FileMaker 12, but in that release we were limited to the predefined themes that FileMaker had included. And while they were certainly useful, there was no way to customize them and truly make them your own. Thankfully, FileMaker gives us the ability to customize themes and even create our own.
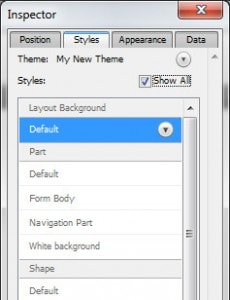
By default, when you create a new file, you will only have access to FileMaker’s built in styles, but you can create your own themes pretty easily, (although it can be potentially time consuming if you add a lot of styles). To do this, you’ll need to look at the inspector. You’ll notice that there is a tab called ‘Themes’. This consists of two parts – the current theme, and a list of styles. By default, only the styles for the currently listed object are shown here, but there is a check box called ‘Show All’ that shows the styles for every type of object in the current theme.
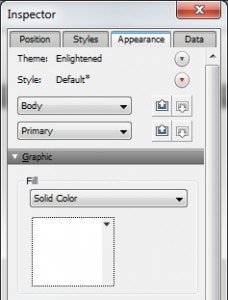
In order to create our new theme though, we’ll need to go to the ‘Appearance’ tab in the inspector. This is where we’ll change the properties of the various layout objects in our solution, and, more importantly, create new styles and modify existing ones. We’ll need to create or modify at least one of the styles in our existing theme to create a new one. To do that, we just need to make a change to the appearance of any object – for example, choose the Body part of the layout and change the back ground colour. Once you make a change to an object, you’ll notice that the name of the Style at the top of the inspector has changed to include an asterix; also, the arrow beside the style has turned red. If you click on the arrow now, you will get several options – Save as New style, save changes to style, etc. Choose Save as New Style, enter a name when you are prompted to, and click OK. This will create a new style that you can use in your theme.
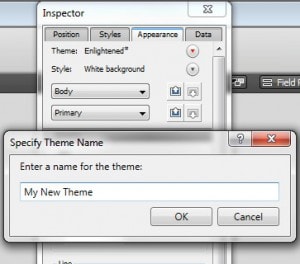
You will now notice that the Theme at the top of the inspector has changed in a similar manner to the style – there is an asterix beside the name, and the arrow beside it has turned red. Clicking on the arrow will again give us several options – but the one that we are interested in is Save as New Theme. Choose that, and you will be prompted to enter a name for your theme. Enter a name, click OK, and now you have your own theme. You can continue to add new styles in the same method as mentioned above.
As mentioned before, creating all the styles you’ll need can be time consuming, especially if you end up using a lot of them, but in the long run they can save you some time and some headaches. As a simple example, let’s suppose you’ve set up all your buttons to have a Blue background. Later on, you may decide you want to change all the buttons in your solution to have a Green background. In previous versions, you’d have to go to every layout, and manually change the background of every button on the layout manually, which could take a long time if you had a lot of layouts (and buttons). If you used the same style for every button, though, you’d just have to make the change to one button, save the changes to the Style, then save the changes to the Theme. Now every button that uses that style, on every layout, is instantly changed, saving you a lot of time.


Comments